VAST EXPERIENCE
Our team of technicians has more than 15 years of experience performing repairs on all major appliances
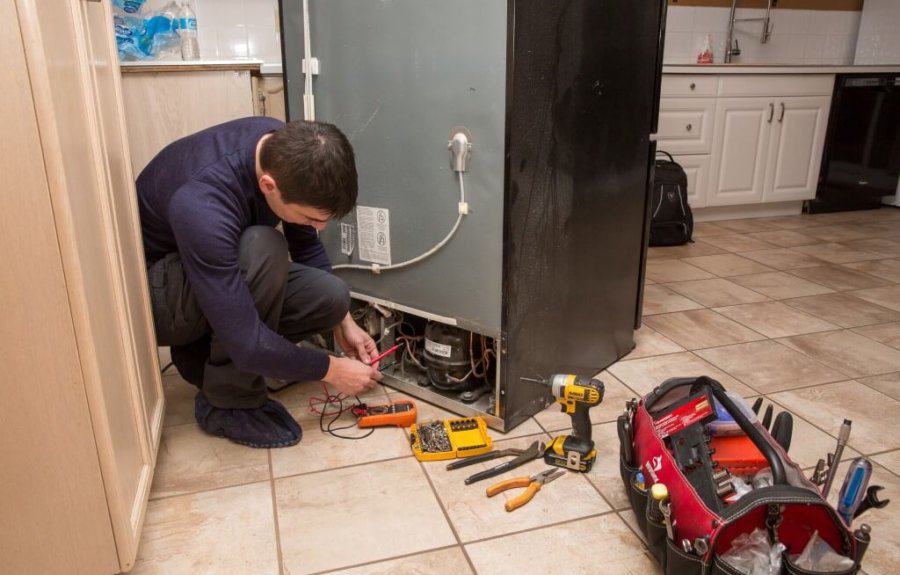
Fridge repair Montreal relies on starts here! Our local certified pros deliver quick and reliable repairs because your fridge deserves the best. Capital Appliance Repair stands for honesty and transparency, we want you to pay for what you get. With our affordable pricing and a limited warranty of up to 1 year on most repairs, trust us to keep your food cool!
Our team of technicians has more than 15 years of experience performing repairs on all major appliances
We are available 7 days a week, and we offer prompt service anywhere in Montreal and the surrounding area.
Almost all of our repairs are covered by up to 1-year limited warranty for your peace of mind.
We always put our customers first, and we understand the value and importance of transparency.
Not only do we perform quality repairs, but we also provide unbeatable prices.
Save yourself the hassle and let us do it right the first time! When we fix things, they stay fixed, fridge repair Montreal trusts.
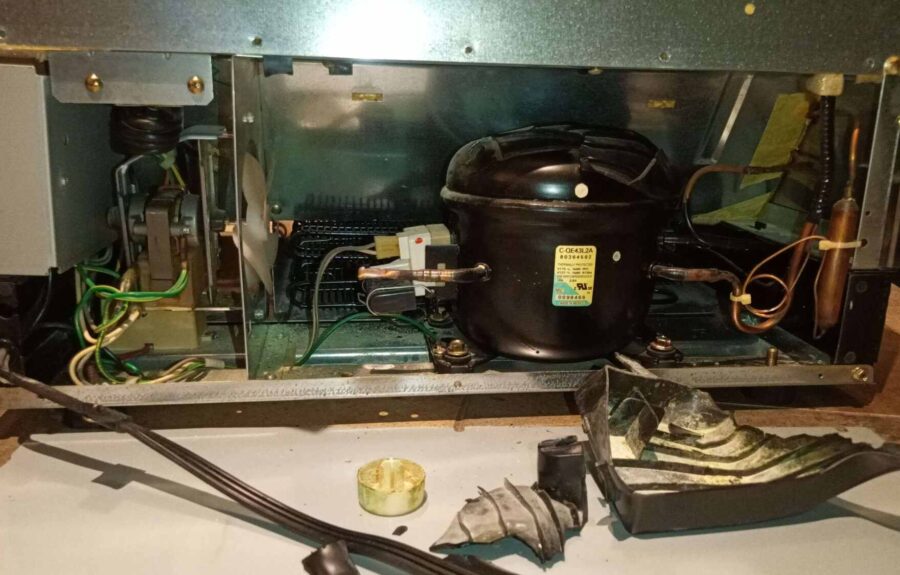
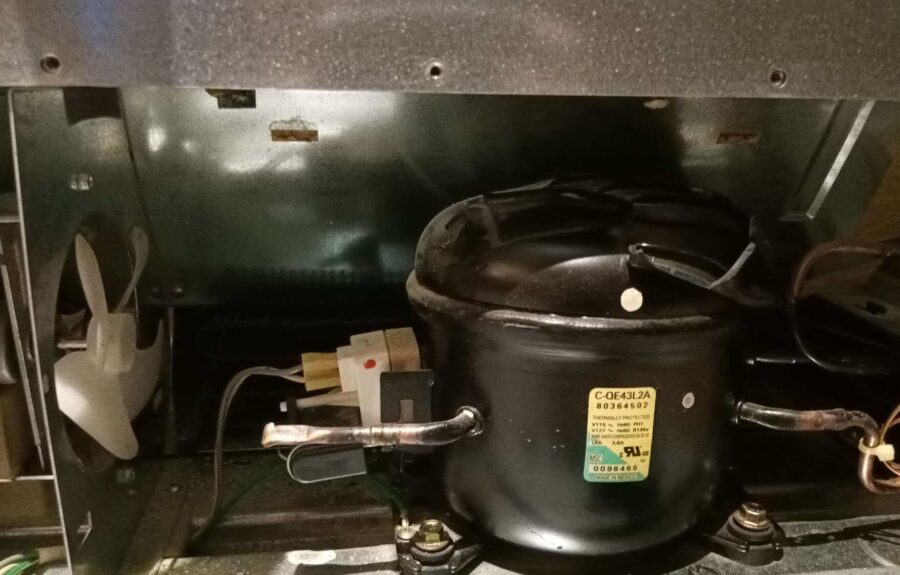
When your fridge stops cooling or starts leaking, it can quickly turn into a household emergency. At Capital Appliance Repair, we provide fast, professional fridge repair across Montreal. Our certified technicians diagnose the problem on the spot and fix everything from compressor failures to ice maker issues. We use quality replacement parts, provide clear upfront pricing, and guarantee our work so your food stays safe and your fridge works like new.

Is your fridge suffering from strange noises, water leakage, or irregular temperatures? All of these are indications that your fridge needs a professional check-up. Let Capital Appliance Repair handle it, we are the fridge repair Montreal residents rely on. From cooling failures and malfunctioning seals to all other issues our pros get your refrigerator working again.
We’re the experts that can fix any problem with your fridge – some of the most common fridge issues in Montreal and surrounding areas that we repair include:
If your refrigerator fails to work properly, it might be time for some parts to be replaced. The most significant parts you should replace include the thermostat, which regulates the temperature within your refrigerator, and the broken door seals which let cool air out.
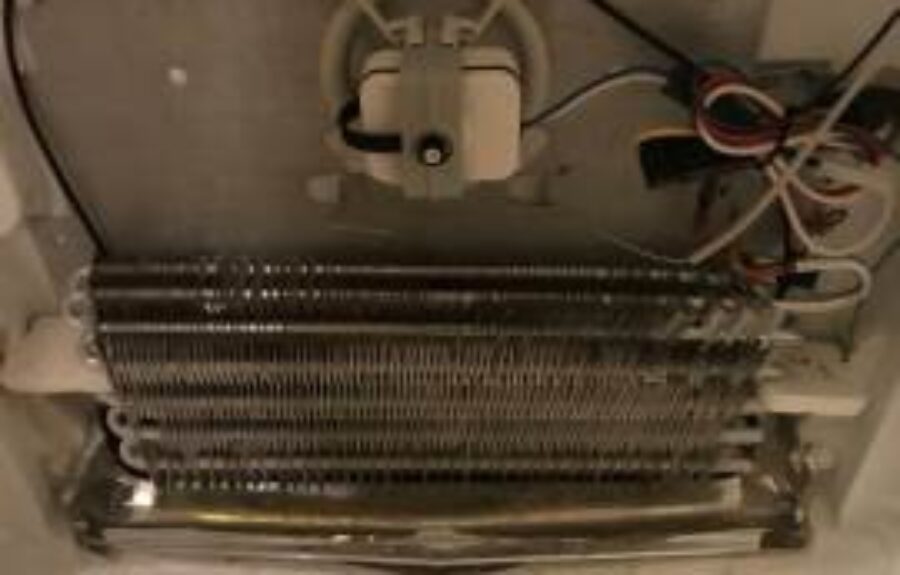
The evaporator fan also plays a great role in circulating cool air throughout. A faulty fan will cause uneven temperatures in your refrigerator. If that is happening you would need to clean or change the condenser coils because clogging highly influences the cooling.
Keeping these parts maintained and replaced helps extend the life of your refrigerator and save you from added costs in future fridge repairs in Montreal.
If your refrigerator is freezing food, it might be due to many common causes, here are some of the primary culprits:
Your fridge temperature should be set between 37°F and 40°F (3°C to 4°C). If the temperature is too low, the vents could cause the food to slowly freeze if it is placed nearby. Try to regulate the temperature and check the settings weekly to make sure your food is unharmed.
Air vents are designed to circulate cold air throughout the fridge, maintaining all the items inside at a consistent temperature. If these vents are blocked by overpacking the fridge, it can limit airflow. To fix this, you should make enough space around air vents for proper flow and organize your fruits and vegetables to avoid overcrowding.
The fridge will be overworking and may freeze food inadvertently because of worn-out or damaged door gaskets that allow cold air to leak out.
A faulty thermostat may not give the proper reading of the temperature, causing the cooling system to run longer than necessary. This can lead to freezing.
Too much dust and debris accumulate on condenser coils. Heavy deposits may force the fridge to work harder, resulting in extremely cold air inside the fridge compartment.
If you are facing these problems, starting points for resolution include adjusting the temperature settings, cleaning vents, and checking seals. If the problem persists, expert assistance from a professional appliance repair technician is highly recommended for effective diagnosis and repair. Feel free to call us at Capital Appliance Repair for expert assistance!
Several factors can lead to water leaking under your fridge, including a clogged defrost drain, damaged water supply line, faulty water inlet valve, uneven leveling, issues with condensation and the drip pan, or blocked evaporator coils. To fix these problems, clean and unclog the defrost drain, inspect and replace any damaged water supply lines, check and possibly replace the water inlet valve, ensure the fridge is properly leveled, regularly clean the drip pan, and remove any blockage from the evaporator coils. Regular maintenance and inspections of these components can prevent water leaks and ensure your fridge operates efficiently.
A clogged defrost drain can be a prime cause of water leakage under the fridge. The defrost drain is responsible for carrying away melted ice and frost from the evaporator coil. Over time, dust, debris, and food particles can accumulate and clog the drain, causing excess water to overflow and pool beneath the fridge.
To clean the defrost drain, you will need to unplug your fridge and remove any accumulated ice from the freezer. Locate the drain hole at the back of the freezer and use hot water and a pipe cleaner to clear any blockages. You could also use a mixture of baking soda and warm water, which is a natural cleaning solution that can help dissolve any residual gunk.
A damaged water supply line can be a cause of water leakage under your fridge and needs to be addressed immediately. To identify this issue, first, turn off the water supply valve to the fridge and unplug it. Locate the water supply line that feeds the fridge and check for any visible damage such as cracks, kinks, or leaks. If you find any damage, replace the water supply line with a new one.
Replacing a damaged water supply line is a simple process that requires a few tools such as pliers and a wrench. First, turn off the water supply valve to the fridge and unplug it. Loosen the compression fitting on both ends of the damaged supply line using pliers or a wrench and remove it. Next, install the new water supply line and tighten the compression fittings. Finally, turn on the water supply valve and check for any leaks.
Regularly checking and replacing damaged water supply lines is important in preventing water leaks under your fridge. Failure to do so can result in costly water damage to your kitchen flooring and baseboard. Keep an eye out for any visible damage and always call a professional if you're unsure about the replacement process.
One common reason for water leaks under the fridge is a malfunctioning water inlet valve. Signs of a faulty valve include inconsistent water flow, leaks from the valve itself, or a complete lack of water supply to the fridge.
To repair or replace a faulty water inlet valve, start by ensuring that the power to the fridge is disconnected. Next, locate the valve usually located at the back of the fridge and carefully disconnect the water supply line. Use pliers to remove the valve and replace it with a new one. Finally, secure the water supply line in place and reconnect the power source.
If you are unsure about how to replace a water inlet valve, consult the fridge's user manual or seek the assistance of a professional technician. Regularly checking the water inlet valve can help prevent water leakages and ensure the proper functioning of your fridge.
An unevenly leveled fridge is a common cause of water leakage. A fridge that is not level can cause water to pool on one side and leak out. It is crucial to ensure that your fridge is level to prevent this issue.
Here are some steps to properly adjust the leveling of your fridge:
Regularly checking and adjusting the leveling of your fridge can prevent water leakage and ensure that your fridge functions optimally.
In addition to the causes listed in the previous sections, condensation and drip pan malfunctions can also lead to water overflowing under the fridge.
Excessive condensation can occur when warm and humid air enters the fridge, causing moisture buildup on the fridge's surfaces. This moisture can eventually drip down and collect underneath the appliance.
The drip pan located underneath the fridge is responsible for collecting this excess water. However, if the pan is damaged, misaligned, or clogged, it can't perform its function correctly, resulting in overflowing and water leakage.
To resolve issues related to condensation and the drip pan, start by cleaning the pan and ensuring that it is appropriately positioned and aligned. Consider inspecting the pan regularly to prevent any dirt accumulation and blockages.
In case of condensation, avoid opening the fridge too frequently and for extended periods. Also, ensure that warm or hot food items are adequately cooled before placing them in the fridge. Doing so will reduce the rate of moisture buildup on surfaces and minimize the chances of water overflowing under the fridge.
Alongside other fridge components, such as defrost drain and drip pan, evaporator coils play a significant role in preventing water leakage. Dirt, dust and debris can accumulate on the coils, leading to blockage and consequently, water leakage. The accumulation of dirt can also lead to increased energy consumption, making it necessary to clean the coils from time to time.
To clean the coils, first, locate them, usually found at the back of the fridge. Unplug the fridge before cleaning to avoid electrical hazards. Gently remove any visible dirt or debris using a soft bristle brush, and use a vacuum or blower to get rid of any debris that is stuck. Be careful not to damage the coils as they are delicate. Once you have cleaned all the coils, plug the fridge back in and enjoy the peace of mind that comes with knowing you have safeguarded it from water leakage.
Regular maintenance is key to preventing water leaks under your fridge. Here are some useful tips to keep your fridge in optimal condition:
Strange noises from your fridge, like buzzing, humming, or clicking, can indicate various issues. Buzzing may point to problems with the condenser fan or compressor, and cleaning the condenser coils might resolve it. Humming often relates to condenser coil or motor issues, requiring coil cleaning or professional motor repair. Clicking noises can signal faulty relay switches or defrost timers, necessitating a timer reset or switch replacement. For all these noises, proper diagnosis and following manufacturer guidelines are crucial, and if the issue persists or you're unsure, seeking professional help is recommended for fixing your fridge effectively.
If your fridge is producing buzzing noises, you might wonder what could be causing the problem. Below are the common reasons why your fridge might produce a buzzing sound:
If your refrigerator is making buzzing noises due to these reasons, it's time to take action. You can troubleshoot the problem yourself, but if you're unsure, it's best to seek professional assistance.
Humming sounds from your refrigerator can be bothersome. They often indicate problems with the condenser coils or the motor. If left unaddressed, these issues can result in more extensive damage to your fridge, affecting its overall performance.
Condenser coils play a crucial role in cooling your fridge's contents. Dirt or debris can build up on the coils, causing them to vibrate and produce humming sounds. Regular cleaning of these coils can prevent this issue from occurring.
The motor is another component that can cause humming sounds. A faulty motor or motor fan can result in unpleasant noises, which can lead to further damage if not resolved. Seeking professional assistance for motor issues is highly recommended, as this component is complex and should only be handled by a qualified technician.
Clicking noises in your fridge can be an indication of a malfunction or a potential issue. It's essential to investigate the causes behind these sounds to resolve them adequately. Common causes of clicking noises in your refrigerator include a faulty relay switch or defrost timer.
When the relay switch is faulty, it produces a clicking sound when turning the compressor on and off. Meanwhile, a malfunctioning defrost timer can cause constant clicking noises.
If you notice clicking sounds in your fridge, it's essential to examine the underlying issues by checking the relay switch and the defrost timer. However, if you're not comfortable with examining and diagnosing your fridge, it's always best to call a professional for assistance.
Strange noises coming from your refrigerator can be a cause for concern. Fortunately, many of these issues can be resolved with a few simple steps.
The first thing to do is to identify the source of the noise. Is it a buzzing, humming, or clicking sound? Once you've determined the type of noise your fridge is making, you can proceed to troubleshoot the issue.
If your refrigerator is making a buzzing noise, it could be due to a faulty condenser fan or compressor. To fix this, try cleaning the condenser coils and ensuring that they are free of debris. If the noise persists, consider contacting a professional for assistance.
Humming sounds can be caused by issues with the condenser coils or the motor. Check the coils for any damage or debris, and clean them if necessary. If the noise continues, it may be time to call in a professional to take a closer look.
Clicking noises could indicate a problem with the relay switch or defrost timer. Try resetting the defrost timer or replacing the relay switch to see if this resolves the issue. If not, it's best to seek professional assistance.
When troubleshooting your fridge for strange noises, it's important to always follow the manufacturer's guidelines. Avoid tinkering with components that you are not familiar with and always unplug your fridge before making any repairs. If you're unsure about how to proceed, don't hesitate to call in a professional.
A noisy refrigerator can be caused by several issues: loose or improperly leveled parts may cause rattling, condenser fan or motor problems might lead to buzzing, issues with the circulation fan motor or defrost timer could result in knocking, and evaporator fan, motor, or compressor troubles may produce grinding sounds. To mitigate these noises, check for loose components, ensure proper leveling, clean the condenser coils, adjust the fridge's temperature, and lubricate or replace faulty fan motors. Regular maintenance and addressing specific parts like the compressor and fan can help keep your fridge running quietly.
Many people assume that a fridge should be completely silent, but this isn't necessarily true. A refrigerator is a complex piece of machinery that relies on various components to function as intended. As a result, there are some normal operational sounds that you may hear while your fridge is running. Being able to discern these sounds from abnormal noises can save you from unnecessary repairs.
If you notice your fridge making unusual sounds, there may be several reasons why. It's important to identify the specific noise to determine the root cause of the problem. Here are some potential causes of a noisy fridge:
Fridge rattling: Loose parts, fan blades hitting ice, or inadequate leveling.
Fridge buzzing: Problems with the condenser fan or motor.
Fridge knocking: Circulation fan motor issues or faulty defrost timer.
Fridge grinding: Problems with the evaporator fan, motor, or the compressor.
The compressor is an essential part of your fridge that pressurizes the refrigerant, allowing it to absorb and release heat. However, if the compressor is not functioning correctly, it can result in increased noise levels. Common issues that may cause compressor noise include:
To resolve compressor-related noise issues, it's essential to hire a professional technician to diagnose and repair the problem. However, there are a few things you can do to prevent compressor noise:
By addressing compressor noise issues and taking preventive measures, you can ensure that your fridge runs smoothly and quietly in the long run.
The fan in your fridge plays a critical role in circulating air and maintaining optimal cooling levels. However, if the fan becomes misaligned or faulty, it can produce a lot of noise. Common issues include wear and tear, accumulation of debris, and lubrication problems.
To troubleshoot the issue, start by unplugging your fridge and checking for any debris or obstruction around the fan blades or the fan motor. You can clean the blades and motor with a soft brush or cloth. If lubrication is the problem, refer to your fridge's user manual for specific instructions. Additionally, ensure that the fan blades are balanced and aligned correctly.
If the issue persists, it may be time to replace the fan motor entirely. You can purchase a new fan motor from your local home appliance store or contact the manufacturer for a replacement.
Remember, if you're unsure how to troubleshoot or fix the issue, it's always best to seek professional help from a licensed technician.
The evaporator fan motor is a critical element of your fridge's cooling system, helping circulate cold air throughout the freezer compartment over the evaporator coils. However, when this motor malfunctions, it can result in loud and disruptive noises, making your fridge an unpleasant presence in your home. So, why does your evaporator fan motor produce noise, and what can you do to fix it?
Don't wait until it's too late. Take action immediately when you hear any unusual noise from your fridge's freezer compartment. A malfunctioning evaporator fan motor can lead to more serious problems if not addressed promptly.
Your fridge's condenser and compressor fan are vital components for maintaining a quiet, efficient appliance. However, with time and use, these parts can become damaged or worn, leading to increased noise levels.
The condenser is responsible for releasing heat outside of your fridge, ensuring the interior stays cool. When the condenser coils become dusty or dirty, they can't function effectively, leading to increased noise as the fridge works harder to keep cool. Regular cleaning and maintenance of the condenser can prevent such issues and keep your fridge functioning quietly.
The compressor fan is responsible for circulating air over the condenser coils, providing cooling and allowing the fridge to function quietly. However, if the fan becomes misaligned or damaged, it can result in increased noise levels. Regular maintenance, including cleaning and checking the fan blades for damage, can help keep your compressor fan functioning properly.
If you're tired of the constant hum of your fridge, there are several solutions you can try to reduce the noise and silence your refrigerator.
Firstly, ensure that your fridge is level. Uneven surfaces can cause vibrations, leading to increased noise levels. Use a spirit level to check if your fridge is levelled properly, and adjust the legs of the fridge if needed.
Another tip is to clean the condenser coils, located at the back of your fridge, as dirt and debris can cause the compressor to work harder, leading to increased noise levels. Use a vacuum or brush to clean the coils regularly to prevent this issue.
Reducing the temperature of your fridge can also help reduce noise levels. Warm temperatures can cause the compressor to work harder, leading to increased noise. Try turning down the temperature and see if it helps reduce the noise.
If the fan motor is the source of the noise, try lubricating it with a few drops of oil to reduce friction. Additionally, replacing the fan motor can help resolve the issue if it is damaged or malfunctioning.
Finally, consider soundproofing the space where your fridge is located. You can install sound-absorbing materials like acoustic panels or even hang thick curtains to reduce echo and absorb sound waves, thereby reducing noise levels.
The warming up of your fridge's fresh food compartment can be caused by factors like insufficient airflow, a damaged door gasket, a malfunctioning thermostat, overcrowding, or poor organization. Blocked air vents or a faulty fan can restrict airflow, while a damaged gasket can allow warm air to seep in. Thermostat problems can lead to inconsistent cooling, and overcrowding can prevent cold air circulation. Regular maintenance, including cleaning condenser coils, checking the door gasket, organizing food efficiently, adjusting temperature settings, and cleaning the interior, is essential to ensure proper cooling and prevent the compartment from warming up.
Insufficient airflow is a common issue that can cause the fresh food compartment to warm up. This problem can be caused by a blocked air vent or a malfunctioning fan. If airflow is restricted, the circulation of cold air is restricted, causing cooling issues and improper refrigeration. It's essential to troubleshoot and resolve these problems to restore proper cooling as soon as possible.
A refrigeration system functions by circulating cold air around the compartment. The air vent provides access to cold air in the freezer, and it must be unobstructed to ensure proper airflow. Sometimes, the air vent can become accidentally blocked by storing items near it. Inspect the air vent and ensure that there is nothing blocking it. Remove any obstructions that may hinder airflow to improve circulation and improve cooling efficiency.
The fan is responsible for circulating air throughout the refrigerator, distributing cold air throughout the fresh food compartment. A malfunctioning fan can disrupt the airflow, causing uneven circulation and temperature issues. If you suspect a faulty fan, it must be quickly replaced with a compatible fan that matches your refrigerator brand and model to avoid further damage. Refer to the manufacturer's guidelines or seek professional assistance to replace the malfunctioning fan to restore optimal cooling performance and prevent further damage.
A damaged door gasket can cause warm air to enter the fresh food compartment, leading to spoilage and reducing the overall lifespan of your fridge. The gasket creates a seal between the door and the cabinet, which prevents warm air from entering the refrigerator and cool air from escaping.
There are a few signs that indicate a damaged door gasket:
If you notice any of these signs, it's likely that your gasket is damaged and needs to be replaced.
Replacing a faulty door gasket is a relatively simple process that can be done in a few easy steps:
A malfunctioning thermostat can cause improper cooling in the fresh food compartment. If the thermostat is not working correctly, it cannot signal the refrigerator to turn on or off, resulting in inconsistent temperatures. This issue can also lead to high electricity bills and unnecessary wear and tear on your fridge.
The most common signs of thermostat issues are warm or frozen food and higher energy bills. To diagnose the problem, use a thermometer to check the temperature inside the compartment. If the temperature is not between 33 to 40°F, the thermostat may be the culprit.
To resolve thermostat problems, you may need to recalibrate or replace the thermostat. Before attempting any repair, always unplug the refrigerator from the electrical outlet and ensure that it is safe to proceed. Refer to the user manual for further instructions or call a professional technician to handle the issue if you are not comfortable doing it yourself.
Did you know that overcrowding the fresh food compartment and poor organization can prevent cold air circulation and lead to a warmer fridge? It's essential to optimize the space and arrange your groceries efficiently to maintain an ideal temperature inside the compartment.
Regular maintenance and cleaning are essential for ensuring the proper functioning of your refrigerator's fresh food compartment. Keeping the compartment clean and well-maintained can prevent various issues that can lead to warming problems. Here are some essential maintenance tips and cleaning routines to follow:
If your fridge's water dispenser isn't working properly, it could be due to clogged filters, low water pressure, malfunctioning valves, or leaks from loose connections or worn seals. Temperature issues, a faulty thermostat, or heating/cooling mechanism problems can prevent dispensing hot or cold water. A strange taste or odor may arise from contaminated filters or mold growth. For non-functioning ice dispensers, check the ice maker, water supply, or dispenser motor. Regular maintenance, such as cleaning, sanitizing, filter replacement, leak inspection, and temperature monitoring, is crucial to keep the dispenser in good working condition.
If you're experiencing a lack of water flow from your dispenser, don't worry; we've got you covered. Below are potential causes and solutions for the issue:
Clogged Filters - Inspect and clean or replace filters as needed.
Low Water Pressure - Check the water supply and replace any damaged or leaking pipes. Also, ensure that the water pressure is set correctly.
Malfunctioning Valves - Inspect and replace any malfunctioning valves. Ensure that they are connected properly.
If you notice water leaking from your dispenser, it may be due to several reasons that need to be checked and fixed to prevent damage and inconvenience. Some of the possible causes include:
Check all connections of the dispenser to ensure that they are tight and secure. If not, hand tighten the connections or use pliers to tighten them gently. Be careful not to over-tighten as it may cause damage.
The seals around the dispenser and water supply line may wear out over time, leading to leaks. Check for any cracks, gaps or tears in the seals and replace them if necessary.
Worn-out or damaged parts like the drip tray or water valve can also cause leakage. Inspect the parts and replace them if required.
It is important to fix any leaks as soon as possible to prevent water damage and accumulation of moisture which can lead to mold growth and foul odor.
Here are a few tips that can help to fix and prevent dispenser leaks:
Having a water dispenser that fails to dispense hot or cold water can be frustrating, especially during the sweltering summer or chilling winter months. If you are experiencing this issue, here are some potential causes and troubleshooting steps to help you resolve it:
Check your dispenser temperature settings and ensure they are properly set to your desired temperature range. Some dispensers have separate thermostat switches for the hot and cold water, so make sure that both switches are turned on and set to the desired temperature.
A malfunctioning thermostat is another common cause of dispenser not dispensing hot or cold water. You can test this by checking if the dispenser heats or cools the water to the correct temperature, or if it's constantly dispensing lukewarm or room temperature water instead. If you suspect that the thermostat is faulty, contact a professional to fix or replace it.
If your dispenser's heating or cooling mechanism is not functioning correctly, it may lead to the dispenser not dispensing hot or cold water. Inspect the heating and cooling mechanisms of your dispenser to ensure that they are in good condition and functioning correctly. If you find a malfunction, contact a professional to repair or replace the relevant parts.
If you notice an unusual taste or odor in the water from your dispenser, it could be a sign of various issues affecting the quality of your water.
One possible reason for the strange taste or odor is contaminated filters. Over time, filters can accumulate impurities, bacteria, and minerals that affect the taste and smell of the water. To fix this, try replacing the filter with a new one, as recommended by the manufacturer.
Another possible reason for the unusual taste or odor in the water is mold growth. This is especially true if the dispenser has not been thoroughly cleaned and sanitized for some time. To remedy this, use a mixture of warm water and vinegar to clean the dispenser and remove mold and other impurities. Be sure to rinse the dispenser thoroughly and let it dry before use.
Stagnant water is yet another culprit that can cause strange tastes and odors. This can occur if the dispenser is not used regularly or if it has not been cleaned for an extended period. Be sure to flush the dispenser regularly, especially if you are not using it frequently. This helps prevent the buildup of bacteria and impurities that can affect the taste of the water.
One of the common issues with water dispensers is when the ice dispenser fails to dispense ice cubes. This can be frustrating, especially during hot summer days. Below we will explore possible causes and offer troubleshooting steps to help you get your ice dispenser working again.
The ice maker is a crucial component of the dispenser. If it's not working correctly, you won't get any ice cubes. To check whether the ice maker is faulty, take a look at the water inlet valve. It could be that it's not providing the required water pressure, preventing the ice maker from working correctly. Make sure the water supply to the dispenser is not restricted or disconnected.
A clogged water supply can also be a reason why the dispenser is not dispensing ice. Check the water supply valve and filter for any blockages. The water filter should be changed regularly, depending on the manufacturer's instructions.
Lastly, check the dispenser motor. If it's malfunctioning, the dispenser won't be able to dispense ice. It could wear out over time or become damaged if it's not used for an extended period. If you suspect that the dispenser motor is faulty, it's best to get in touch with a professional to assess the issue.
Regular maintenance of your water dispenser is crucial to ensure its optimal functioning and longevity. Here are some preventive tips to keep your dispenser in good shape:
When your fridge door isn't closing properly, it can lead to a range of issues, from spoiled food to higher energy bills. Understanding the common causes behind this problem is the first step in finding a solution. Here are the main issues that can affect your fridge door's ability to close tightly:
Misaligned hinges - In this case, the door might not be flush against the fridge’s body, allowing the cold air to escape.
Faulty gaskets - If the gasket is damaged or degraded, it might not properly seal the door, leading to air leaks.
Improper leveling - If the fridge isn't leveled correctly, the door might swing open or close and not seal correctly.
Misaligned hinges can cause a variety of problems, including a fridge door that won't close properly. Thankfully, fixing this issue is easy and can be done in a few simple steps.
To start, locate the hinges at the bottom of the fridge door. If they appear misaligned, you'll need to loosen the screws that hold them in place. Use a screwdriver to do this, being careful not to strip the screws.
Next, adjust the hinges until they're straight. You may need to have someone hold the door while you do this to ensure it stays in place. Once the hinges are aligned, tighten the screws to hold them back in place. Test the door to make sure it opens and closes smoothly.
If the hinges are bent or damaged, you'll need to replace them entirely. Check your fridge's user manual or contact the manufacturer to determine what type of hinges you need and how to install them properly.
Faulty gaskets can significantly impact the fridge door's ability to close properly, causing air leaks and increased energy consumption. Over time, gaskets may become brittle or damaged due to wear and tear, allowing cold air to escape and warm air to enter the unit. If you suspect that faulty gaskets are causing your fridge door to not close correctly, follow these steps to replace them.
Close the fridge door and inspect the gasket for signs of wear, including cracks, deformities, or tears. Use a flashlight to check for any visible gaps between the gasket and the fridge's surface, indicating air leaks. If you notice any of these issues, it's time to replace the gasket.
Check the fridge's model number and purchase a replacement gasket suitable for your fridge. You can order gaskets online or buy them from a local appliance store. Always choose a gasket that perfectly fits the fridge door's size and shape.
Starting from one corner, pull the old gasket off the fridge door, being careful not to damage the door or the surrounding surfaces. Sometimes, the gasket may be glued or fastened to the door, so use a putty knife or a screwdriver to remove any adhesives or anchoring hardware.
Place the new gasket over the fridge door, ensuring it lines up with its edge and corners. Gently press the gasket into place, making sure it adheres to the door and creates a tight seal. If necessary, consult the gasket manufacturer's instructions for additional guidance.
Close the fridge door and check for any visible gaps or air leaks. The door should now close snugly and firmly. If the door still doesn't close correctly, recheck the gasket's alignment and adjust it as necessary.
By replacing faulty gaskets, you can significantly enhance your fridge's performance, saving energy and reducing the risk of food spoilage. Performing a routine checkup of your fridge gaskets can help identify any trouble spots, allowing you to replace them as needed and ensure proper door closure.
If your fridge is not properly leveled, it can cause the door to not close properly. This can lead to cool air escaping, reducing the overall efficiency of your fridge. To check if your fridge is level, place a level on top of it. If it is not level, adjust the front legs until it is, using a wrench if necessary.
You can also use shims to level the fridge if the legs do not adjust enough. Place the shims under the front legs until the fridge is level. It is important to note that over-leveling can also cause the fridge door to not close properly.
Regularly checking and adjusting the leveling of your fridge can prevent future fridge door closure problems and keep your fridge running smoothly.
Prevention is key when it comes to maintaining proper fridge door closure. Here are some useful tips:
If your fridge isn't cooling properly, it could be due to incorrect temperature settings, dirty condenser coils, damaged door seals, or a malfunctioning evaporator fan. Check and adjust the temperature, clean the coils, inspect and replace the door seals if needed, and ensure the evaporator fan is working correctly. Avoid overcrowding the fridge to maintain proper air circulation. If these steps don't solve the problem, it's best to seek help from a professional technician for a more comprehensive repair.
One of the primary reasons for a refrigerator not cooling is incorrect temperature settings. If your fridge is not maintaining the desired temperature, it could result in inadequate cooling, causing spoilage of food items. By regularly checking and adjusting the temperature settings, you can ensure that your fridge is functioning correctly and prevent any cooling issues.
The condenser coils of a refrigerator play a crucial role in the cooling process by releasing heat from the fridge. Over time, the build-up of dust, dirt, and debris on the condenser coils can hinder the refrigerator's cooling capability and cause it to work harder than necessary.
Clean condenser coils can improve the refrigerator's energy efficiency and extend its lifespan. To clean the condenser coils:
Cleaning the condenser coils should be a part of regular refrigerator maintenance to ensure optimal cooling performance.
When it comes to maintaining your refrigerator's cooling capacity, the door seals play a crucial role. Properly sealed door seals keep cold air from escaping, which prevents the refrigerator from having to work harder to maintain the desired temperature.
To inspect the door seals for damage or gaps, start by closing the door on a piece of paper. Try to pull the paper out with the door closed; if it slides out easily, it's a sign that the door seals are not functioning properly. You can also visually inspect the seals for any cracks or tears.
If you find any issues with the door seals, clean them thoroughly with warm, soapy water, and replace them if necessary. Most manufacturers offer replacement door seals for their models. Alternatively, you can use a rubber sealant to patch any small gaps or seal any tears.
The evaporator fan is responsible for circulating cool air throughout the refrigerator, ensuring proper cooling. A malfunctioning fan can lead to inadequate cooling and spoilage of stored food. If you notice your fridge not cooling, it's essential to check the evaporator fan.
Here are the steps to check and troubleshoot the evaporator fan:
Regular maintenance of the evaporator fan, such as cleaning any buildup or replacing worn-out components, can help extend its lifespan and ensure optimal cooling performance.
Proper air circulation is vital for maintaining consistent cooling in your refrigerator. Without it, you may experience cooling problems caused by blocked air vents. Here are some tips to ensure proper air circulation:
If all troubleshooting steps fail to fix the cooling problem, it's time to consult a professional technician. Trying to fix the issue yourself can result in further damage or, worse, personal injury.
Professional technicians are trained to handle various refrigerator malfunctions, and they can identify the root cause of the issue quickly. They can also offer advice on how to prevent future refrigerator problems.
Investing in professional repair services can save you time, money, and effort in the long run. You'll have peace of mind knowing that your refrigerator is in safe hands and will be working efficiently in no time.
