VAST EXPERIENCE
Our team of technicians has more than 15 years of experience performing repairs on all major appliances
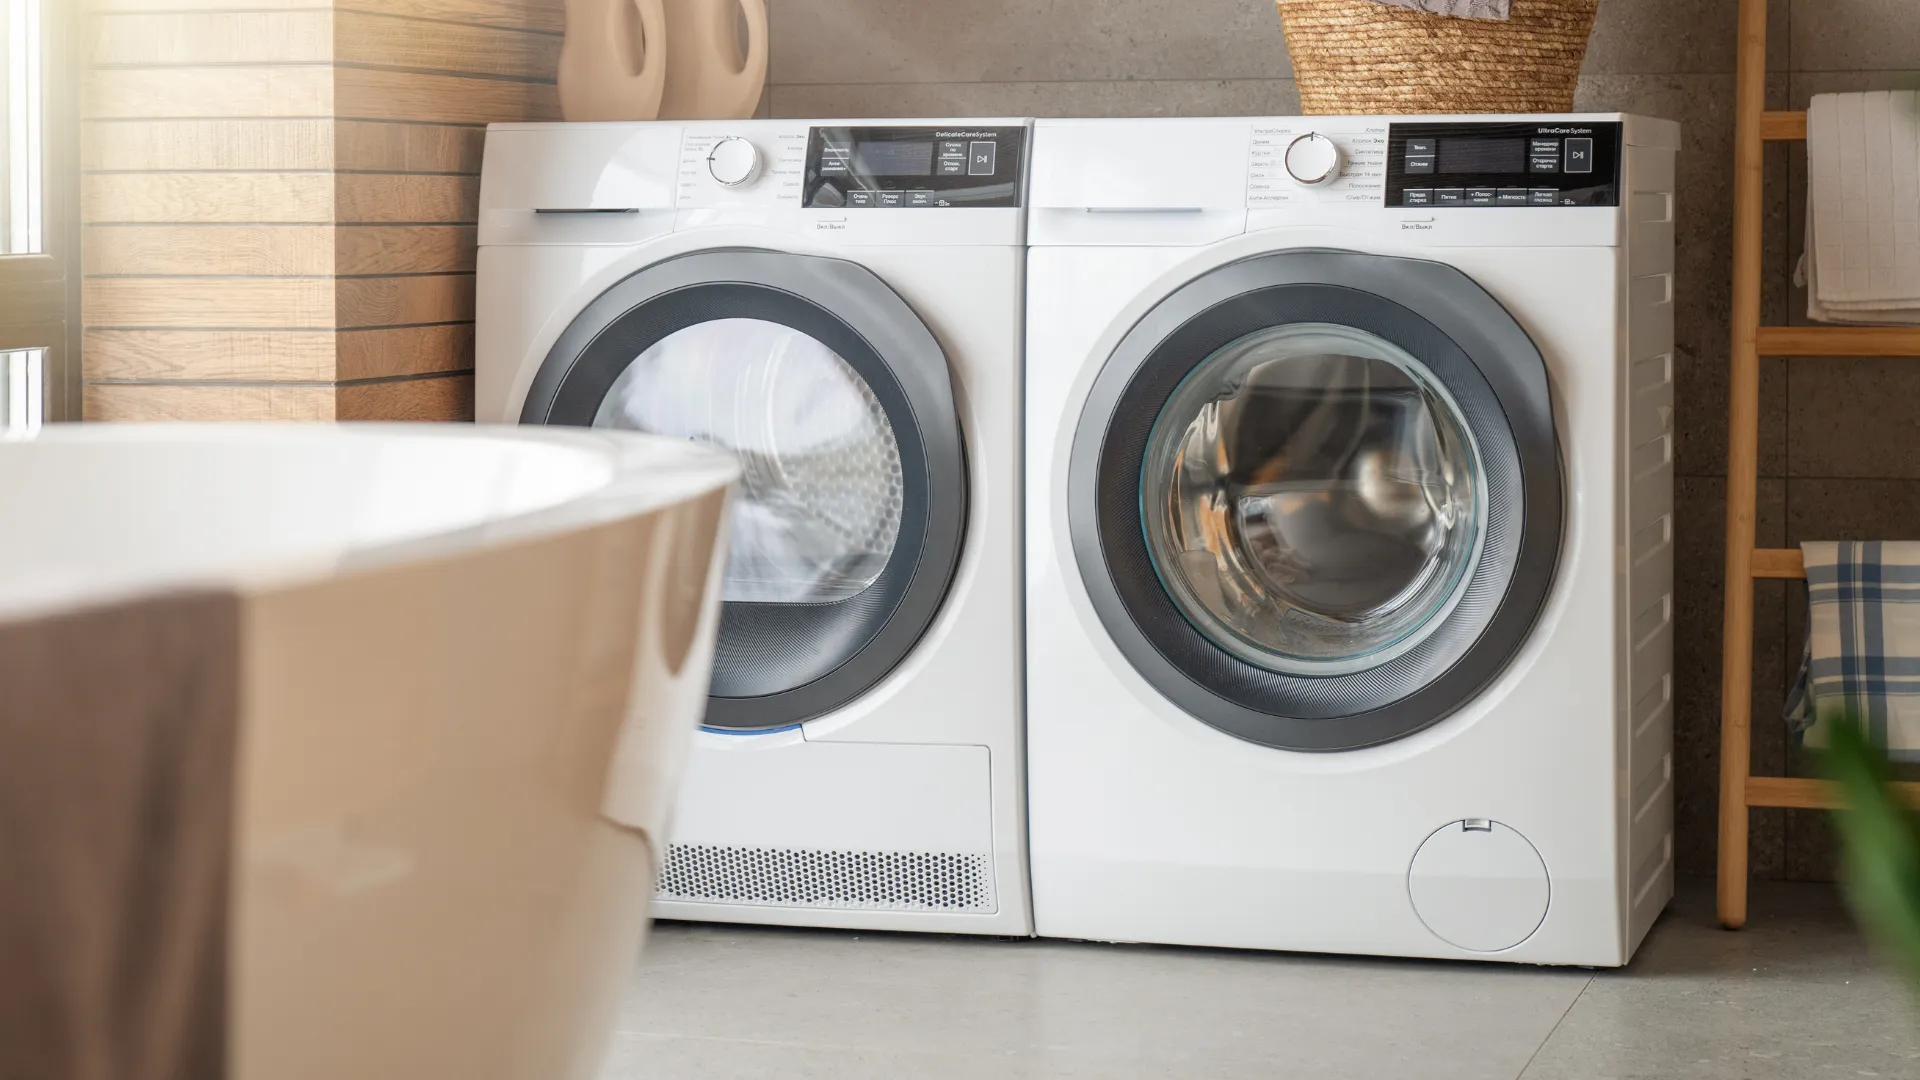
Capital Appliance Repair services washing machines across Montreal and the surrounding area, often the same day. Our licensed technicians fix every major brand and the usual problems: a washer that won’t spin, drain, or fill, plus leaks, loud banging, and error codes. Call (514) 667-4479 to book.
Capital Appliance Repair understands just how important it is to have a fully functional washer. That’s why we’re available 7 days a week, providing washer repair Montreal can count on. Our technicians are fully trained to fix any washer problem, plus we offer up to 1-year limited warranty on most repairs!


When it comes to washer repair Montreal counts on, we’re here 7 days a week to serve the city and surrounding areas. Our technicians are trained to provide speedy and reliable washer repairs, and we back our work with a satisfaction guarantee!
Our team of technicians has more than 15 years of experience performing repairs on all major appliances
We are available 7 days a week, and we offer prompt service anywhere in Montreal and the surrounding area.
Almost all of our repairs are covered by up to 1-year limited warranty for your peace of mind.
We always put our customers first, and we understand the value and importance of transparency.
Not only do we perform quality repairs, but we also provide unbeatable prices.
Save yourself the hassle and let us do it right the first time! When we fix things, they stay fixed.
A washing machine that leaks, won’t spin, or refuses to start can disrupt your entire routine. Our experienced technicians provide prompt, expert washer repair. We handle all brands and models, quickly replacing worn parts, fixing drum issues, or repairing control boards. With Capital Appliance Repair, you get honest advice, clear estimates, and dependable repairs so your laundry keeps flowing without interruption.
When your washing machine starts acting up, leave it to the experts at Capital Appliance Repair! We bring over 15 years of trusted washer repair experience, fixing all makes and models, including stackable washers and dryers. Common washer repair problems we tackle include:
Strange sounds from a washer can be caused by various issues like loose objects in the drum, unbalanced loads, worn-out drum bearings, faulty pumps or motors, clogged drains or filters, and damaged drive belts. To troubleshoot, check for any objects in the drum, ensure loads are balanced, inspect drum bearings, and examine the pump, motor, and drive belt for damage or wear. Regularly clean filters and drains to prevent clogs. If these steps don't resolve the noise, it's best to seek professional assistance for a thorough inspection and repair.
If you hear strange sounds coming from your washer, loose objects in the drum could be the cause. Items such as keys or coins can bounce around during the wash cycle, resulting in rattling or clanging noises. To check for loose objects, turn off your washer and take a look inside the drum. Remove any objects you find before starting your next load to prevent further noise.
If you've noticed that your washer is making loud banging or thumping noises, the cause could be an unbalanced load. When the weight of the laundry is unevenly distributed, the washer can become off-balance, leading to excessive vibrations that can create disruptive noises.
To avoid this issue, make sure to properly load your washer. Distribute the laundry evenly throughout the drum and avoid overcrowding it with too many items. If you're washing a large bulky item like a comforter, add a few smaller items to balance out the weight. Taking these steps can help to prevent an unbalanced load and the accompanying noise issues.
If you hear squeaking, grinding, or screeching sounds coming from your washer, it may be due to worn-out drum bearings. These bearings can wear out over time and cause the drum to spin unevenly, resulting in noise during operation.
To determine if worn-out drum bearings are the issue, try spinning the drum by hand. If it makes a grinding noise or feels rough, it's likely time to replace the bearings.
Replacing the drum bearings is a complex task and should only be attempted by experienced individuals or professionals. Contact a trusted repair service to perform the replacement and ensure a quiet and smooth laundry experience.
If you notice buzzing, humming, or whirring noises coming from your washer, the pump or motor may be faulty. A faulty pump can prevent proper water circulation, leading to disruptive noises, while a faulty motor can cause irregular vibrations and strange sounds. Firstly, turn off the power supply, and inspect these components for any physical damage or loosened connections. Then, follow the manufacturer's instructions on troubleshooting or replacing the faulty part. If you're uncomfortable with DIY repairs, reach out to a professional service to fix the issue.
A clogged drain or filter can cause disruption to your washer, leading to unexpected noises, such as gurgling or bubbling. To avoid such sounds, it is essential to regularly check for and remove any blockages from the drain or filter, ensuring proper water flow and avoiding any blockages.
If you notice any unusual sounds while using your washer, the first step is to check the filter and drain for any blockages. Unplug the washer and locate the filter and drain, which are usually located at the front or back of the machine. Gently remove any debris and dirt using a soft cloth or brush. For tougher buildups, you can use a mixture of warm water and vinegar to clear the blockage.
If clearing the filter and drain doesn't resolve the issue, the problem might be more severe. In such cases, you might need to contact a washing machine repair expert to troubleshoot and fix the problem effectively. Regular cleaning and maintenance of your washer can prevent clogging and improve the lifespan of your machine.
The drive belt is a crucial component of your washer that connects the motor to the drum. If the drive belt becomes worn or damaged, it can lead to squealing or squeaking noises during operation. It is important to inspect the drive belt regularly to identify any signs of wear and tear.
To inspect the drive belt, unplug your washer and locate the belt at the back of the drum. Check for any visible signs of damage, such as cracks or fraying. If the belt appears to be in good condition, try spinning the drum by hand to see if the belt is loose or slipping. If the belt needs to be replaced, consult your washer's manual or a professional repair service for guidance on the appropriate replacement part.
Replacing a damaged drive belt can restore the smooth and quiet operation of your washer. With proper maintenance, you can avoid future issues with drive belt wear and ensure a reliable laundry experience.
If you have tried all the troubleshooting steps mentioned above and your washer is still making strange sounds, it may be time to seek professional assistance.
Washer vibrations can be caused by an unlevel machine, unbalanced loads, damaged shocks or dampers, improper placement, or uneven washer feet and floor. To fix this, level the washer, evenly distribute laundry loads, check and replace shocks or dampers if necessary, ensure the washer is on a solid surface, and adjust or repair washer feet and the floor beneath it. If vibrations persist despite these steps, professional assistance may be needed to diagnose and resolve underlying issues.
An unlevel washer can cause significant vibrations that can disrupt your laundry routine. Fortunately, leveling the washer can help address this issue and ensure a quieter laundry day. To level your washer:
A balanced washer is key to reducing vibrations and helping prevent future issues. Take the time to level your washer properly for a smoother laundry day.
An unbalanced load is among the most frequent culprits of washer vibrations. Unbalanced loads usually happen when some clothes clump together, making the washer drum heavier on one side than the other. This uneven distribution of weight causes the washer to vibrate excessively during the spin cycle.
To address this problem, it is essential to redistribute the clothes uniformly inside the drum before commencing the spin cycle. If you notice that your clothes are continually becoming unbalanced, try washing them in smaller loads. Decreasing the load size will reduce the likelihood of unbalanced loads and the resulting vibrations.
Another way to mitigate unbalanced loads is to choose the appropriate cycle for the type of laundry. Delicate fabrics require a gentler spin cycle than heavier items such as towels or sheets. If you are washing various fabric types in the same cycle, sort them by weight to prevent unbalanced loads.
When it comes to preventing washer vibrations, shocks and dampers play a crucial role. These components help to absorb the impact of the spinning drum and keep it from bouncing around excessively. If these parts become damaged or worn out, it can result in a washer that vibrates excessively. That's why it's important to regularly inspect your washer's shocks and dampers for any signs of wear and tear.
To check for damaged shocks, start by unplugging your washer and removing the lower panel. Look for any signs of leakage or damage to the shock absorbers. If you notice any issues, it's best to replace the shocks as soon as possible to prevent further damage to your washer.
When it comes to dampers, you'll want to check for any signs of wear or damage as well. This typically involves removing the top panel of the washer to access the dampers. Inspect them for any cracks, leaks, or other signs of damage. If you notice any issues, you'll want to replace the dampers to keep your washer running smoothly.
Regularly checking for damaged shocks or dampers is a simple yet effective way to prevent washer vibrations and ensure that your appliance is running at its best. By keeping an eye on these components and staying on top of any necessary repairs, you can help extend the life of your washer and avoid the hassle of dealing with a shaking machine.
Proper washer placement is crucial for preventing vibrations during use. If your washer is not placed on a solid, level surface, it may become unbalanced, causing vibrations. To prevent this from happening, ensure that your washer is placed on a level surface and avoid overcrowding the laundry area.
Additionally, it is recommended that you follow the manufacturer's instructions for proper installation of the washer. This includes ensuring that the washer is properly leveled and secured to prevent it from moving or shifting during use.
By maintaining proper washer placement and installation, you can significantly reduce the risk of vibrations and ensure a smoother laundry experience.
One often-overlooked factor that can contribute to washer vibrations is the condition of the washer's feet and the floor it sits on. Over time, a washer's feet can become uneven, causing the appliance to wobble and vibrate during use. Similarly, if the floor beneath the washer is not level, this can also contribute to unwanted vibrations.
To check the condition of the washer's feet, start by making sure the appliance is unplugged and empty. Then, use a level to check the position of each foot, adjusting as needed to ensure that they are all firmly in contact with the floor. If a foot is damaged or otherwise unable to be adjusted, it may need to be replaced.
In addition to examining the washer's feet, take a close look at the condition of the floor beneath the appliance. Is it level and stable? Are there any loose tiles or other issues that could be contributing to vibrations? By addressing any issues with the floor, whether through repairs or by moving the appliance to a different location, you may be able to reduce unwanted washer vibrations and enjoy a smoother laundry experience.
While the above methods can be effective in reducing washer vibrations, there may be instances where persistent vibrations persist despite these efforts. In such cases, seeking professional help is recommended.
A professional can diagnose and address underlying issues that may be causing the persistent vibrations. This may involve conducting a thorough maintenance check or repairing or replacing damaged components.
If your washing machine isn't starting or running, common causes include power supply issues (tripped circuit breaker, faulty outlet, damaged cord), door/lid interlock problems, control panel malfunctions, and motor/mechanical failures (like a worn drive belt). Check each of these areas, starting with the power source, ensuring the door is properly closed, resetting the control panel, and inspecting the motor and mechanical parts. If these steps don't resolve the issue, professional repair may be necessary.
If your washer won't turn on or there's no power to the washing machine, it could be due to power supply issues. To get your washer back up and running, check for the following potential problems:
A washer door that doesn't close properly or a faulty interlock mechanism can prevent your washing machine from running. It's important to ensure that the door or lid is securely closed for the washing cycle to begin.
If your washer door is not closing, there may be an obstruction preventing it from closing properly. Check for any foreign objects or debris that may be stuck in the latch. Also, make sure that the door or lid isn't bent or damaged in any way.
In some cases, the interlock mechanism may be faulty, preventing the washer from starting even if the door or lid is securely closed. You can try unplugging the washer and plugging it back in after a few minutes to see if that resets the interlock. If the issue persists, it may be necessary to replace the interlock mechanism.
Having a properly functioning door or interlock mechanism is crucial for the safe operation of your washer. If you're not comfortable with troubleshooting or repairing this issue on your own, it may be best to consult a professional appliance repair service.
When your washing machine buttons are not responding or your washer cycle does not start, there might be an issue with the control panel and settings. This type of problem can often be fixed by reprogramming the control panel or resetting the settings to their factory defaults.
If there are error codes appearing on the display, consult the manual to identify the issue. Often, a simple solution to clear the error code involves unplugging the washing machine and then plugging it back in after a few minutes.
Another possibility is that the settings are incorrect. Double-check that you have selected the correct cycle and that the right options are selected. If the settings are correct, but the cycle still won't start, then consider cleaning the control panel's buttons. Sometimes dirt and grime can cause button failure.
When your washing machine won't agitate, it may be due to a faulty motor or other mechanical issues. A malfunctioning motor can cause the washer to stop functioning altogether.
If you suspect that the motor is the problem, there are a few things you can do. Check if the power supply is functioning correctly and inspect the drive belt to see if it's worn or damaged. If the belt is defective, it can cause the motor to stop working.
Other mechanical failures that can cause the washer to malfunction include a worn-out agitator or a broken coupler. Sometimes, these problems may require professional repair services.
If your washer stops mid-cycle, common issues include power supply interruptions (like tripped circuit breakers or faulty outlets), water supply problems (such as faulty inlet valves or clogged filters), malfunctioning components (including faulty door switches, worn belts, or defective timers), and overloading or unbalanced loads. To troubleshoot, check the power source, ensure proper water flow, inspect key components for wear or damage, and avoid overloading or unevenly distributing laundry. If these steps don't resolve the issue, professional repair may be necessary.
Power supply interruptions can be a common cause of a washer stopping mid-cycle. There are various reasons why power supply interruptions can occur, such as tripped circuit breakers, power outages, or faulty electrical connections.
One way to check for power supply issues is to ensure that the washer is securely plugged into an operational outlet. It's also essential to check the circuit breaker and verify that it hasn't tripped. In cases of power outages, it's best to wait for the power to be restored.
If a washer continues to experience power supply interruptions, there may be a problem with the electrical connections. Always consult with a professional electrician to assess and resolve any faulty electrical connections.
Water supply problems are a common reason why washers stop mid-cycle. If the water inlet valve fails to open or close properly, it can cause the washer to stop. Similarly, a clogged filter can impede the flow of water and cause problems with the washer. Additionally, insufficient water pressure can prevent the washer from completing its cycle.
If you're experiencing water supply problems, it's important to troubleshoot the issue before continuing to use the washer. Check the water supply hoses and ensure that they're properly connected and not kinked or twisted. Verify that the water pressure is adequate and that the filter is not clogged.
The washer comprises several components that work together to provide an uninterrupted laundry experience. However, malfunctioning components can cause a washer to stop mid-cycle, causing inconvenience to homeowners. Common culprits include faulty door switches, worn-out belts, and defective timers.
If a faulty door switch is to blame, the washer may not start or may stop mid-cycle. To diagnose this issue, check if the door is completely closed and ensure the switch aligns correctly with the door strike. If the door switch is defective, it may require replacement.
Worn-out belts can cause the washer drum to stop spinning. Symptoms of this issue include a burning rubber smell or a drum that won't turn. To fix this issue, replace the belt or seek professional help.
Defective timers can also cause the washer to stop mid-cycle. Symptoms of this issue include a cycle that doesn't advance or a cycle that runs longer than expected. If this is the case, replace the timer or seek professional assistance.
Diagnosing and fixing malfunctioning components may require mechanical knowledge. If you're unsure of how to proceed, it's best to call a professional to avoid further damage to the machine.
Putting too much laundry into the washer or loading it with unbalanced loads can cause it to stop mid-cycle. This is because the machine's sensors detect that the load is too heavy or imbalanced and automatically stops the cycle to prevent damage to the machine.
Overloading the washer can also lead to poor cleaning performance and increase wear and tear on the machine, shortening its lifespan.
To avoid overloading the washer, be sure to check the machine's capacity and avoid exceeding it. You can also break up large loads into smaller ones to lighten the load and help the machine perform optimally.
Unbalanced loads can be caused by too much laundry on one side of the drum or by heavy items being mixed with lightweight ones. To fix an unbalanced load, stop the machine and redistribute the laundry evenly in the drum. You may also need to add or remove some items to achieve balance.
Foul odors in washers can be caused by improper cleaning practices, dampness, mildew growth, soap residue, fabric softener build-up, clogged or dirty filters, unbalanced loads, stagnant water, and lack of ventilation. To address these issues: don't overload the washer, use the correct amount of detergent, clean the washer regularly with vinegar, wipe down the drum and door gasket, balance loads properly, clean the filter, and ensure proper ventilation.
Regular washing machine maintenance is crucial to ensure that your machine performs at its best and doesn't emit any unpleasant odours. However, improper cleaning practices can contribute to the washer smelling bad.
One common mistake is overloading the washer. This can prevent clothes from getting clean and cause the machine to work harder, which can lead to a buildup of soap residue and promote the growth of mildew.
Another mistake is using too much detergent or fabric softener. Both can leave behind buildup that can cause a musty odour. It's important to follow the manufacturer's recommendations for proper usage and dosage.
Cleaning different parts of the machine effectively is essential. Be sure to clean the detergent dispenser, the door seal, and the drum thoroughly on a regular basis. You can use a mixture of baking soda and white vinegar to clean these areas, which helps to break down any buildup and remove bad odours.
One of the main reasons for a foul odor in your washer is dampness. When moisture doesn't evaporate properly, it can create an ideal environment for mildew and mold growth, which leads to a musty smell. The growth of mildew affects not only the smell of the washer but can also lead to health issues for you and your family.
Avoid dampness in your washing machine by leaving the lid open between uses to let it air out. If you have a front-loading machine, wipe down the rubber gasket around the door and the drum to ensure there is no excess moisture. Make sure to remove wet clothes promptly to prevent stagnant water and mildew growth.
To prevent mildew from returning, use a washing machine cleaner regularly, to remove residual detergent, dirt, and minerals. You can also add baking soda or vinegar to the laundry cycle to neutralize any odors and keep your washer fresh.
Leaving soap residue and fabric softener in the washer can contribute to a bad smell. Make sure to measure out the correct amount of soap and fabric softener needed for each load, as using too much can cause build-up.
It is also important to clean the dispenser regularly with a cloth or brush. If there is visible residue that won't come off, remove the dispenser and soak it in warm water and detergent before rinsing and replacing. Alternatively, use a washer cleaner like Tide Washing Machine Cleaner once a month to help remove any built-up residue and prevent bad odours.
Finally, avoid using fabric softener altogether if possible, as it can leave a residue on clothes and in the washer. Try using dryer sheets or a natural alternative like wool dryer balls instead.
The filter in a washing machine plays an important role in keeping clothes clean and the machine functioning properly. However, over time, the filter can become clogged or dirty and start to impact the washer's smell.
A clogged filter can limit the flow of water in the machine, causing an unpleasant odour to develop. A dirty filter can also contribute to the growth of bacteria and mildew, making the smell worse.
To prevent this, it's important to clean or replace the filter regularly. Check your washing machine's manual for instructions on how to do this, as it can vary depending on the make and model. In general, the filter is located near the front of the machine and can be removed for cleaning. Be sure to remove any debris or buildup and rinse it thoroughly before re-inserting it.
Washing machines that have unbalanced loads or stagnant water can develop unpleasant odours. When clothes aren't distributed evenly throughout the drum, the washer vibrates excessively, which can lead to water accumulating in areas that don't receive proper drainage. Over time, the stagnant water can provide a breeding ground for bacteria and cause a musty smell.
To prevent these issues, make sure to evenly distribute clothes before starting the cycle. If the washer continues to vibrate excessively, try rearranging the clothes until they are distributed evenly. Also, be sure to clean the drum and other interior parts of the washer regularly to prevent lingering moisture. After completing a wash cycle, leave the door open for a few hours to allow for proper ventilation and drying.
A lack of ventilation in a washing area can further exacerbate odours in the washer. Without proper airflow, the moisture and heat generated during the machine's operation can become trapped, creating a breeding ground for bacteria and mould to grow.
To ensure proper ventilation, it's important to keep the washer's vents clear and unblocked, allowing air to circulate freely. Avoid placing the machine in a cramped or enclosed area, as this can restrict airflow and trap damp air.
Regular maintenance is key to ensuring your washing machine smells fresh and clean. Here are some prevention tips to keep your machine in top condition:
If your washer fails to drain, common causes include a clogged drain hose, blocked pump filter, malfunctioning drain pump, defective lid switch, or improper drain hose placement. To address these, check and clear the drain hose of debris, clean the pump filter, inspect and potentially replace the drain pump, test and replace a faulty lid switch, and ensure the drain hose is correctly positioned and unobstructed. Other less common issues might involve a faulty pressure switch, control board problems, or plumbing blockages, which may require professional assistance.
A clogged drain hose is a common issue for a washing machine that fails to drain. If your washer is experiencing this problem, it is possible that debris and lint have accumulated in the hose, impeding the flow of water.
To diagnose this issue, start by disconnecting the drain hose from the washer and checking for any blockages. If you find a clog, try removing it manually or using a plumbing snake to clear the debris.
Another possible culprit for a clogged drain hose is a kink in the line. Ensure the hose is not twisted or bent in any way that may restrict the flow of water.
Regular maintenance can help prevent this issue from occurring. Check and clean the drain hose periodically, especially if you notice any slow draining or standing water in the washer drum.
If unclogging the drain hose does not solve the problem, it may be necessary to inspect other components of the drainage system, such as the pump filter or drain pump.
If your washer is not draining properly, it could be due to a blocked pump filter. The filter is responsible for catching debris, such as lint and coins, and preventing them from entering and damaging the pump. Over time, the filter can become clogged, obstructing the flow of water and causing drainage issues.
To clean the pump filter, first, unplug the washer and locate the filter, which is typically located at the front of the machine. Next, place a container below the filter to catch any water that may spill out during the process. Then, unscrew the filter cap and carefully remove the filter. Rinse the filter under running water, using a brush to remove any stubborn debris. Once the filter is clean, replace it, ensuring it is securely in place. Finally, screw the cap back on, plug in the washer and test it by running a cycle.
Regularly checking and cleaning the pump filter can help prevent drainage issues and prolong the lifespan of your washer.
If your washer is failing to drain and the drain hose and pump filter appear to be clear, the culprit may be a malfunctioning drain pump. This component is responsible for removing water from the machine, and if it's not working correctly, the washer won't drain properly, leaving standing water in the drum.
The first step in troubleshooting a malfunctioning drain pump is to check for any noticeable damage or wear and tear. If everything appears to be in good condition, you can test the pump using a multimeter to check for any electrical issues. If the pump is indeed the source of the problem, you'll need to replace it, which requires some basic tools and mechanical aptitude.
Before attempting to replace the pump, be sure to disconnect the washer from its power source and water supply. Once that's done, locate the pump, which is typically located at the bottom of the machine, and remove it from the washer. Install the new pump following the manufacturer's instructions, and then reassemble the washer.
If none of the troubleshooting steps resolve the issue, it might be time to call in a professional to inspect your washer and offer potential solutions.
The lid switch is an essential component that must function correctly for a washer to drain water efficiently. If the switch is defective, the washer might not initiate the draining cycle as it does not register that the lid is closed. This could lead to standing water in the drum, signaling a hindrance in your washing activity.
To test if the lid switch is faulty, unplug your washer and locate the switch. You can do this by removing the control panel or the entire top of the machine. Disconnect the wiring from the switch and use a multimeter to check for continuity. If the switch does not show continuity when the lid is closed, then it is faulty and needs replacement.
To replace the switch, first, make sure you have the correct replacement part. Then, access and remove the old switch and install the new one in its place. Finally, connect the wiring back to the switch and reassemble the washer's top or control panel.
Checking and replacing a faulty lid switch can restore your washer's draining performance, ensuring you have no standing water after your laundry load is complete.
Having the drain hose positioned improperly can cause drainage issues in a washer. If the hose is too high or too low, it can result in water flowing back into the machine or preventing proper drainage altogether. This can lead to issues such as standing water in the drum or a musty odor.
To assess the drain hose placement, examine the hose for any kinks, twists, or damage. Ensure that the hose is properly secured in place with clamps or ties, and that it is not too close to any heat sources.
If you discover that the drain hose is not positioned correctly, adjusting it may be necessary for optimal performance. Make sure that the hose is at least 18 inches from the ground and that it is not inserted more than 6 inches into the standpipe. This will help ensure proper drainage and prevent backflow.
By paying attention to the drain hose placement, you can avoid many drainage issues with your washer. Take the time to assess and adjust the hose as needed, and you'll have better results with your laundry.
There are a few other potential culprits behind a washer failing to drain properly. One possible issue is a faulty pressure switch, which regulates water levels and may malfunction, preventing the washer from draining. In some cases, problems with the main control board can also disrupt the draining cycle.
Additionally, plumbing problems can interfere with the washer's draining function. If the drain line is clogged or there is a blockage in the main sewer line, it may create a backup in the washer.
It's important to note that while these issues are less common, they are still possible causes of a washer failing to drain. If you've exhausted other troubleshooting methods and are still experiencing drainage problems, it may be worthwhile to investigate these potential causes further or consult with a professional.
When your washer has low water levels, it can affect laundry performance. This issue may be due to an insufficient water supply, clogged inlet screens, incorrect water level settings, a faulty water level sensor, or improper load distribution. To address these issues, check for any blockages in the water inlet valve, ensure the home's water pressure is adequate, regularly clean the inlet screens, correctly adjust the water level settings per your load size, ensure the water level sensor is functioning properly, and avoid overloading the washer.
A common cause of low water level in a washer is an insufficient water supply. This can happen when the water inlet valve is partially blocked or when the water pressure from the main supply is low.
If the water inlet valve is blocked, start by turning off the water supply and disconnecting the inlet hose from the back of the washer. Check for any debris or mineral deposits clogging the valve and clean it thoroughly before reconnecting the hose and turning the water supply back on.
If the water pressure is low, check your home's main water supply and ensure that the pressure is within the appropriate range for your washer. You can also try cleaning the inlet screens and checking for any leaks that may be affecting water pressure.
If you are experiencing low water levels in your washer, clogged inlet screens could be the culprit. These screens are responsible for filtering out debris and minerals from the incoming water supply, but when they become clogged, water flow is restricted, resulting in a lower water level in your washer.
To ensure uninterrupted water supply, it’s important to regularly clean and maintain these screens. Begin by turning off the water supply to your washer. Remove the hoses from the back of the machine and inspect the screens for any buildup of debris or minerals. Using a soft brush or toothbrush, gently clean the screens to remove any accumulated dirt or deposits. Rinse them thoroughly and reattach the hoses, being careful not to overtighten them.
To prevent future clogs, consider installing a water filter. This will remove impurities from your water supply before it reaches your washer, preserving the longevity of your machine and ensuring optimal performance.
If you experience low water level in your washer, it may be due to a faulty water level sensor. This component is responsible for detecting the water level inside the washer and instructing the machine to fill appropriately. A malfunctioning sensor can result in inadequate water levels in the washer, negatively affecting laundry performance.
To troubleshoot this issue, first, ensure that the washer is receiving sufficient water supply and that the inlet screens are clean. If those components are functioning correctly, the water level sensor may need replacement. Consult the manufacturer's instructions or contact a qualified technician for assistance.
If you find that the water level in your washer is consistently too low, it's possible that the water level settings are incorrect. Many washers allow you to manually adjust the water level, but if it's set too low, the machine may not fill with enough water to properly clean your laundry.
To check your water level settings, consult your washer's manual for specific instructions. In general, you'll want to ensure that the water level is appropriate for the size of your load. If you're unsure what level to choose, a good rule of thumb is to fill the washer with enough water to cover the clothes completely without overflowing.
Keep in mind that some washers may automatically adjust the water level based on the size and type of load, so it's important to familiarize yourself with your machine's settings. By correctly adjusting the water level, you can help ensure your clothes are properly washed and reduce the risk of damage to your washing machine caused by overcrowding.
If you're experiencing low water levels in your washer, it could be due to improper load distribution. When clothes are packed tightly or unevenly, water may struggle to reach all the items, leading to inadequate water levels during the wash cycle. This means that some of your clothes may not be getting properly cleaned.
One way to ensure proper load distribution is to not overload the washer. It's important to follow the manufacturer's guidelines on load size and distribute your clothes evenly around the agitator or drum. A good rule of thumb is to only fill the washer about three-quarters full to allow enough space for proper water circulation.
By properly distributing your laundry load, you can optimize water distribution and improve laundry performance. Remember, a balanced load is key to achieving a thorough wash with sufficient water levels.
Washer leaks can be caused by faulty hoses, damaged door or lid seals, malfunctioning pumps, or defective water inlet valves. To troubleshoot, regularly inspect and replace damaged hoses, check and maintain the door or lid seal, examine the pump and drain hose for blockages or leaks, and inspect the water inlet valve for cracks or wear. If these troubleshooting steps don't resolve the issue, it may be necessary to seek professional assistance from a certified repair service or plumber.
Faulty hoses can be a significant cause of washer leaks. Over time, the hoses that connect the washer to the water supply can become worn out or develop cracks, which can lead to water leaks. To prevent this issue, it's essential to inspect the hoses for any signs of damage regularly. This includes checking for bulges, tears, or leaks, particularly around the connections. If you notice any problems, replace the hoses immediately to prevent water leaks.
A malfunctioning door or lid seal can be another reason for washer leaks. Over time, the seal can become damaged or worn out which can cause water to seep through and result in leaks. By regularly inspecting the door or lid seal, you can identify any signs of damage and take necessary measures to maintain its effectiveness.
Cleaning the seal with a mild detergent solution and wiping it dry can help prevent the build-up of dirt and debris which can compromise the seal's ability to keep water inside the washer. If you notice any cracks or tears, it's important to replace the seal as soon as possible to avoid further leaks.
In addition to regular maintenance, it's important to be careful when closing the washer door or lid. Slamming the door shut can cause unnecessary stress on the seal which can lead to damage over time.
The pump and drain hose play an essential role in the functioning of your washer's drainage system. A malfunctioning pump or a damaged drain hose can lead to leaks. To check the pump, inspect it for any signs of blockages or leaks. Ensure that the pump is securely connected to the washer. To inspect the drain hose, make sure it is not twisted or kinked, and there are no cracks or obstructions. If you notice any leaks or damage, replace the pump or hose.
The water inlet valve is crucial in regulating the flow of water into the washer. If it is not functioning properly or has a problematic seal, it can lead to leaks. To troubleshoot any potential causal factors stemming from the inlet valve, there a few factors to consider:
After trying out the troubleshooting tips mentioned above, if your washer still leaks, it may be time to seek professional assistance. Trying to fix the issue yourself without adequate knowledge or experience can lead to more damage and cost you more in the long run.
Calling a washer repair service or a professional plumber who specializes in appliance repair can help diagnose and fix the problem effectively. Professional assistance can save you time, effort, and money by identifying the root cause of the issue and implementing a permanent solution.